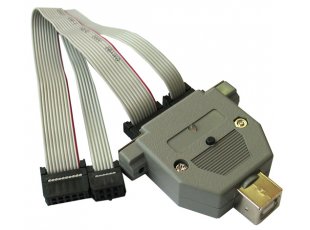
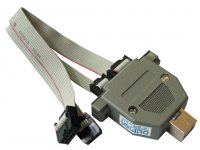
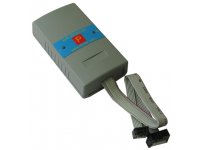
AVR-ISP500-TINY
| Price | 19.95 EUR |
|---|---|
| 10 - 49 pcs | 17.96 EUR |
| 50 - 10000 pcs | 15.96 EUR |
AVR-ISP500-TINY is a fast and reliable USB AVR programmer. It has two modes of work: STK500-compatible USB programmer and USB mass storage. In STK500 mode it works with both Atmel studio and AVRDude.
AVR-ISP500-TINY uses the STK500v2 communication protocol. In mass storage mode it creates a new drive on your computer and when you drag and drop the HEX file to this drive, it programs it in the target AVR attached to the ICSP connector. This is totally platform-independent and works on any computer without the need of any software.
AVR-ISP500-TINY has an internal flash of 2MB and can store the last command and code that you executed in AVR studio or avrdude and then you can execute it again with a single button push. This means that once you load the code in the internal flash, you can program targets quickly with the same binary code by a single button press.
FEATURES
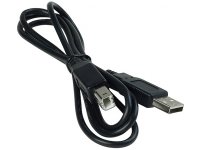
- Connects to PC via USB, USB type B connector
- STK500v2 compatible mode
- Works with Microchip Studio, AVRDUDE, AVR Studio, Atmel Studio, and any tool that supports STK500v2 protocol
- Tested and confirmed working under Linux; Windows XP, Vista, 7, 8, 10, 11
- Mass storage mode (require firmware swap)
- Internal flash of 2 MB for stand alone programming with single button press
- Two ICSP connectors - Atmel's 10 pin (2x5) ICSP and 6 pin (2x3) ICSP connectors
- Does not require external power supply - it gets powered by the USB, but can't power the target
- Uses Atmel's 2x5 pin ICSP and 2x3 connector layout
- Dimensions: 45x30mm ~ (1.7x1.2)" + 20cm ~ 8" cable
HARDWARE
- AVR ICSP 10 pin connector (top view)
- AVR ICSP 6 pin connector (top view)
FAQ
- I installed the drivers but I can't connect to the target! Any ideas?
- This programmer does not power the target! First make sure to get your target powered! If the problem persists:
- Inspect the hardware connections
- Test with different the ISP baudrate (higher and lower)
- Test with another target
- I can't get this programmer working with Arduino IDE. What should I do?
- Follow the installation algorithm below. It was tested and confirmed working with Windows 10 and Arduino 1.6.7:
1. Plug AVR-ISP500-TINY to the computer via USB cable with a USB type B connector.
2. If you have a newer version of Windows the drivers would install automatically. If they do not install automatically, download the drivers from the links above and manually point the installer to the drivers. If the installer refuses to install the drivers due to the lack of signature - make sure to disable the "Driver Signature Enforcement" and then try to install the drivers again. Upon a successful installation a new COM port would appear in "Windows Device Manager".
3. Before launching Arduino IDE you need to add a configuration for the Olimex programmer. It is simple – navigate to *\arduino-1.6.7\hardware\arduino\avr\ and open the file programmers.txt for editing. At the end of the file add the following:
olimexisp.name=Olimex ISP500
olimexisp.communication=serial
olimexisp.protocol=stk500v2
olimexisp.program.tool=avrdude
olimexisp.program.extra_params=-P{serial.port}
4. Launch Arduino IDE and select Tools –> Programmer –> “Olimex ISP500”; also select the COM port of the programmer as listed in “Windows Device Manager”(!) after a succesfull driver install
5. Remember to click Sketch –> Upload using programmer – if you just click “Upload” then Arduino IDE would attempt to upload via the USB.
Related Products - People who bought this product also bought
USB STK500v2 compatible AVR programmer with 6 pin and 10 pin ICSP connector support
This item is OBSOLETE
USB STK500v2 compatible AVR programmer with 6 pin and 10 pin ICSP connector support and 1000VDC isolation