≡
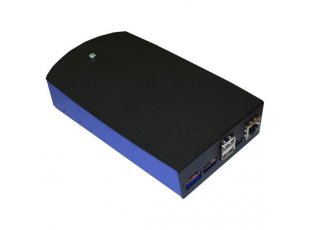
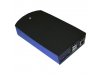
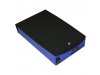

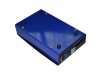
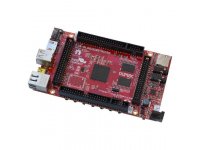
BOX-MICRO-A
Metal Box for A20-OLinuXino-MICRO
Select Product Variant
- BOX-MICRO-A-BLACK
- BOX-MICRO-A-BLUE
- BOX-MICRO-A-GREEN
- BOX-MICRO-A-RED
- BOX-MICRO-A-SILVER
| Price | 12.00 EUR |
|---|---|
| 10 - 49 pcs | 11.40 EUR |
| 50 - 10000 pcs | 10.80 EUR |
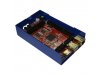
This is an elegant and at the same time robust metal box which protects your A20-OLinuXino-MICRO from dust and electromignetic interferences. Easy to attach to other appliances with four mounting holes which could be also be used for rubber feet. The box allows access to all of the A20-OLinuXino-MICRO connectors and interfaces. There are small holes provided to access the board's buttons. There are openings cut at the side for ribbon cables attached to the IDC connectors inside or for the serial cable.
FEATURES
- Metal upper cover in black color
- Metal base in black color
- Four rubber feet
- Four hex spacers for the A20-OLinuXino
- Nine screws M3 x 4 mm
- Dimensions: 155 x 95 x 30 mm
DOCUMENTS
Note when assemblying the case - make sure that the metallic parts and components of the board don't make contact with the box - this would lead to short circuits when you apply power supply! Note that incorrect assembly might leave certains buttons pressed - check if the board's buttons can be properly pressed and de-pressed after assembly.FAQ
- What is the proper way to assemble the case and the board?
- Remove the screw that holds the two parts of the box together. Separate the two parts. Attach the four metallic spacers at the bottom of to the A20-OLinuXino-MICRO board using 4 of the screws! Then place the board at the bottom part of the case and use another 4 screws to keep the spacers attached. It is important to use the spacers - else there might be short-circuits or the buttons might be permanently pressed. The metallic spacers should be positioned between the board and the bottom part of the case. The whole setup should be: screw <- board - metallic spacer - bottom case -> screw. Finally, close the top part of the case, place the screw between the two parts of the caase and place the rubber feet at the bottom.
Never power the A20-OLinuXino-MICRO board before you have fully assembled the box! Else some of the components at the bottom of the board might short-circuit.