Difference between revisions of "A20-OLinuXino-MICRO"
(→Software) |
|||
| Line 8: | Line 8: | ||
== Software == | == Software == | ||
| + | |||
| + | To update the Android image (located on the NAND) you need the PhoenixSuit program (and not LiveSuit as in A13 and A10s boards). | ||
| + | [https://docs.google.com/file/d/0B7WHuNCASY8caWRNUy00VUszbDg/edit?usp=sharing PhoenixSuit download] | ||
| + | |||
| + | To write a Linux image to an SD card under Windows we use Win32 Disk Imager: | ||
| + | |||
| + | *Download Win32 Disk Imager [http://sourceforge.net/projects/win32diskimager/ Win32 Disk Imager] | ||
| + | *Insert card | ||
| + | *Start program | ||
| + | *Select file | ||
| + | *Click "write" | ||
| + | |||
| + | To write a Linux image to an SD card under Linux: | ||
| + | |||
| + | For instance an image with the file name of "debian_2g.img" would be downloaded to the SD card connected to a linux machine using one of the following commands: | ||
| + | |||
| + | <code># dd bs=4M oflag=sync if=debian_2g.img of=/dev/sdX</code><br /> | ||
| + | or<br /> | ||
| + | <code># cp debian_2g.img /dev/sdX</code> | ||
| + | |||
| + | where X is the uSD card. | ||
| + | |||
| + | |||
| + | == Official images == | ||
'''A20-OLinuXino-MICRO preliminary Debian image''' | '''A20-OLinuXino-MICRO preliminary Debian image''' | ||
| Line 44: | Line 68: | ||
'''A20-OLinuXino-MICRO preliminary Android NAND image''' | '''A20-OLinuXino-MICRO preliminary Android NAND image''' | ||
| − | |||
| − | |||
| − | |||
[https://docs.google.com/file/d/0B-bAEPML8fwlNUJwV0plZWc2Nk0/edit?usp=sharing Android 4.2.2 for A20-OLinuXino NAND] | [https://docs.google.com/file/d/0B-bAEPML8fwlNUJwV0plZWc2Nk0/edit?usp=sharing Android 4.2.2 for A20-OLinuXino NAND] | ||
Revision as of 02:02, 25 July 2013
Documents
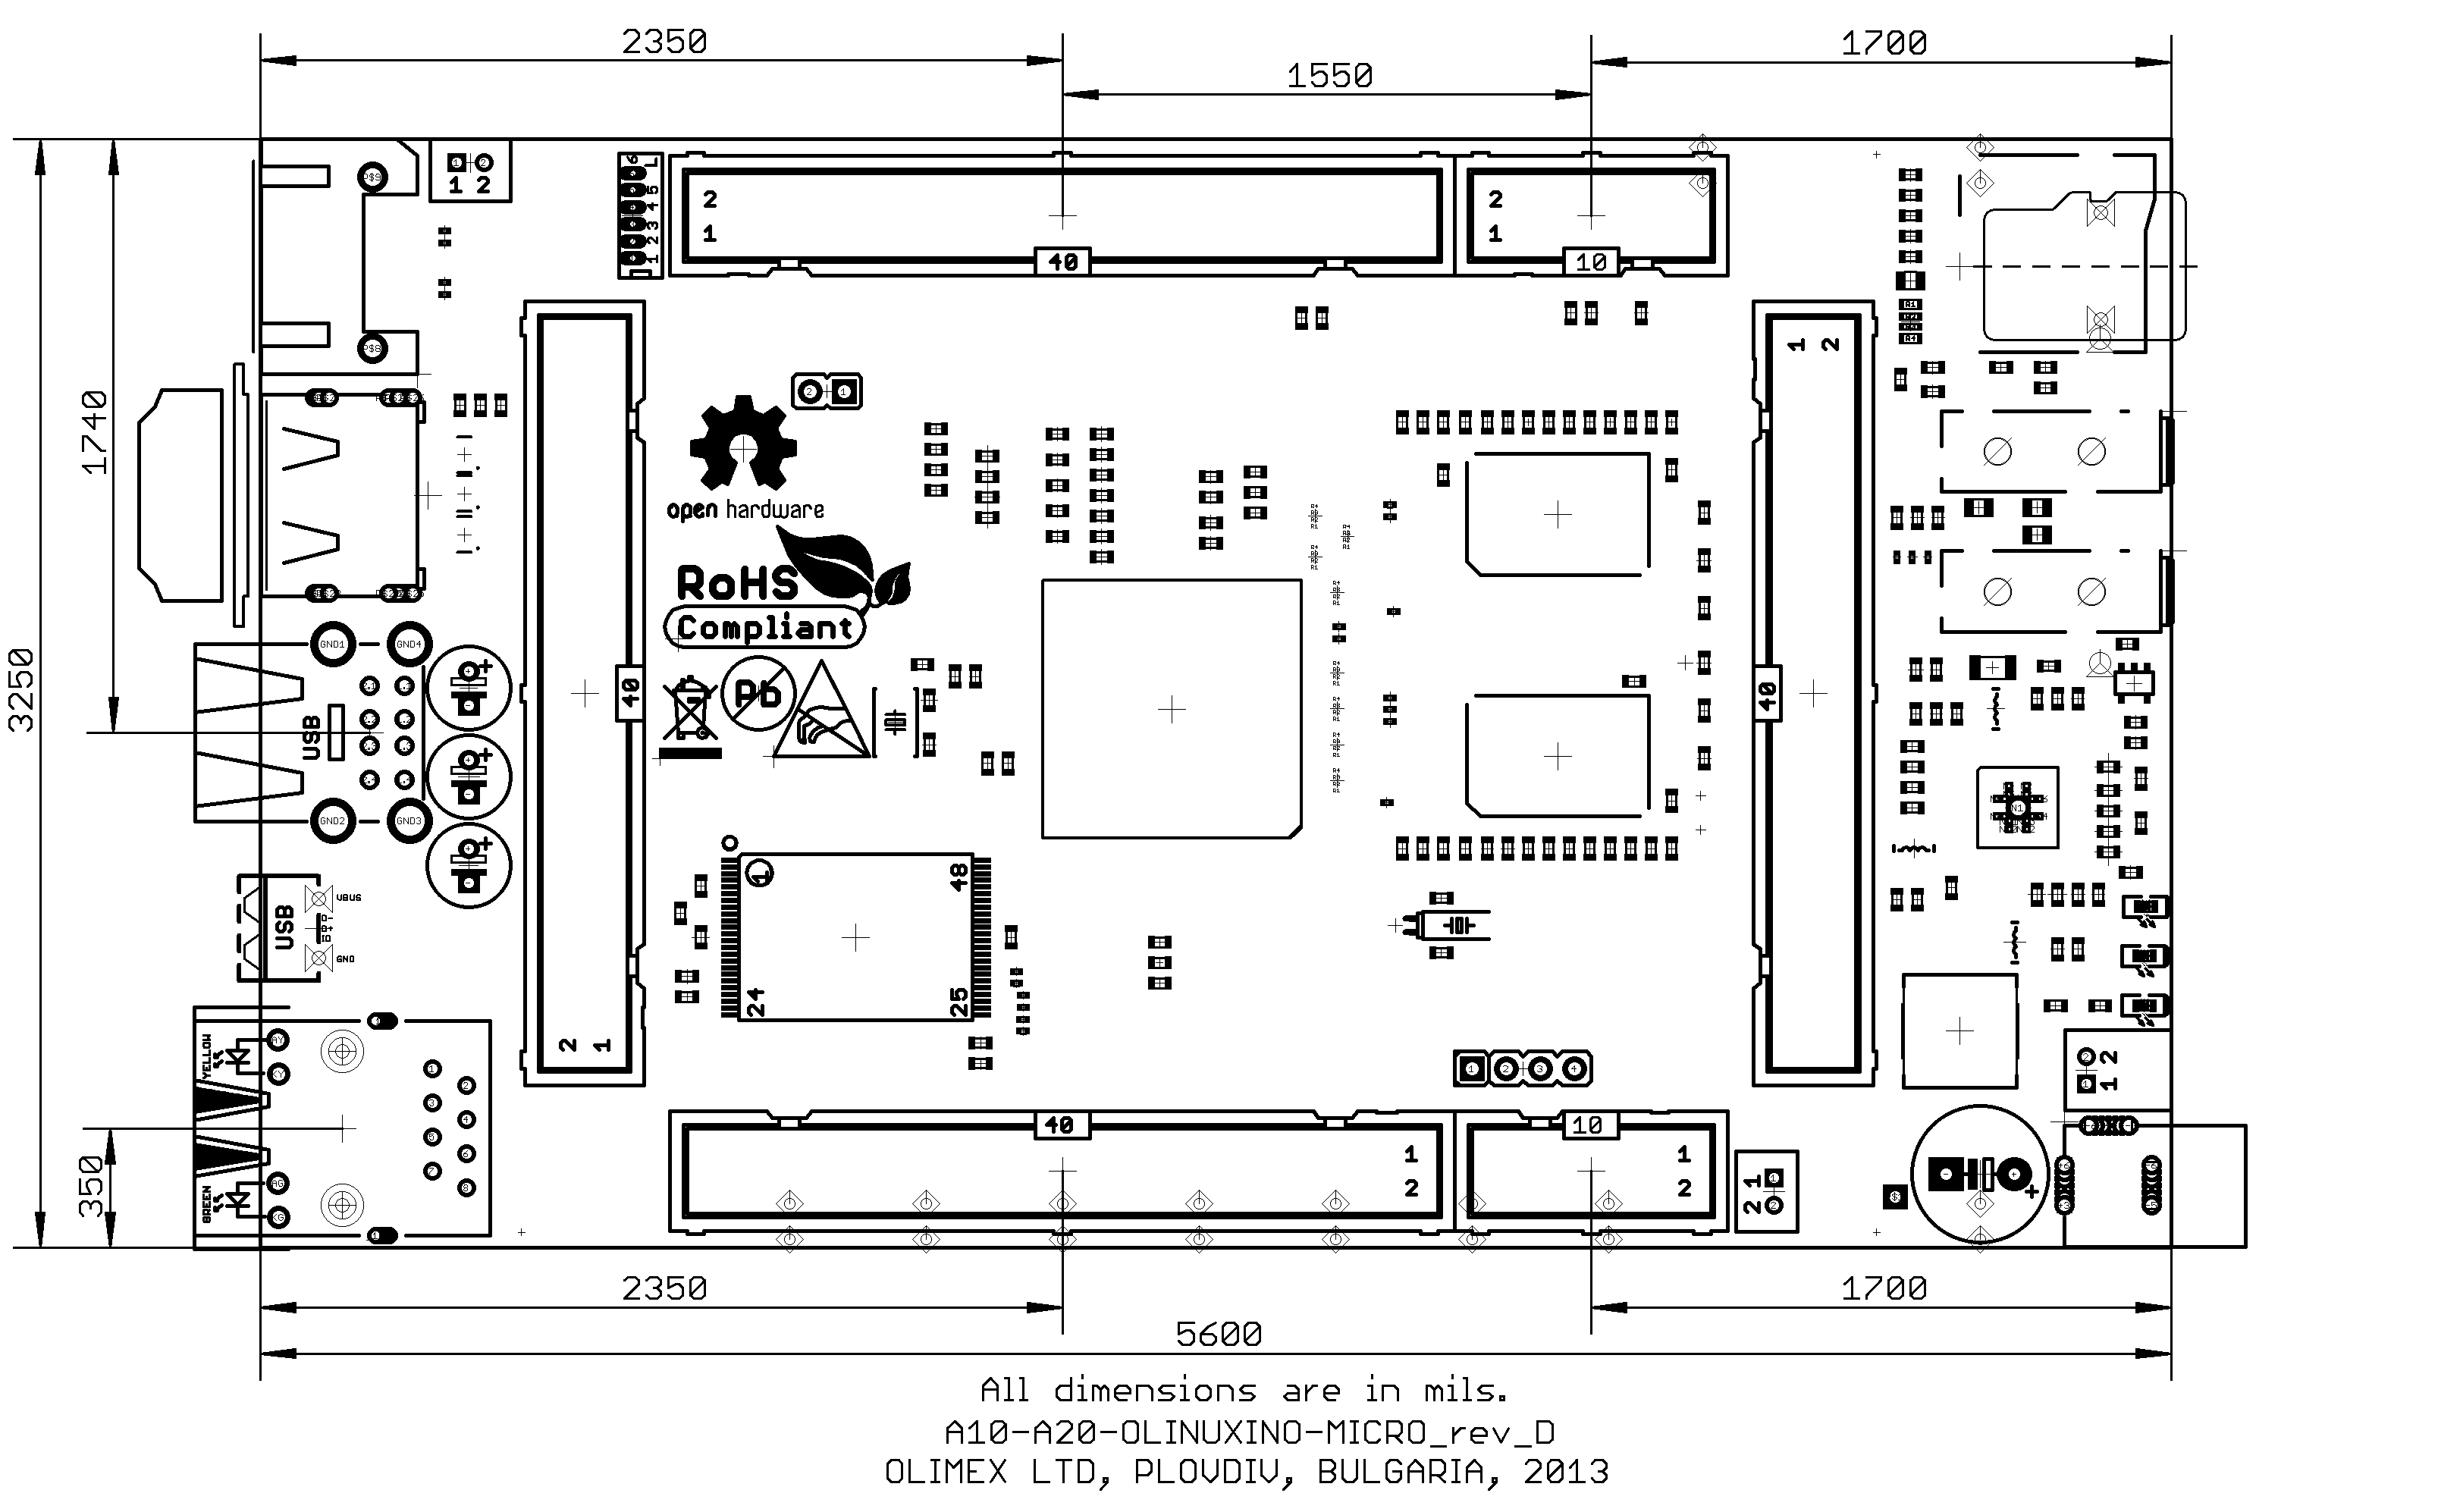
A20-OLinuXino-MICRO and A20-OLinuXino-MICRO-4GB basic dimensions in mils: image in PNG format
Hardware
Under construction
Software
To update the Android image (located on the NAND) you need the PhoenixSuit program (and not LiveSuit as in A13 and A10s boards). PhoenixSuit download
To write a Linux image to an SD card under Windows we use Win32 Disk Imager:
- Download Win32 Disk Imager Win32 Disk Imager
- Insert card
- Start program
- Select file
- Click "write"
To write a Linux image to an SD card under Linux:
For instance an image with the file name of "debian_2g.img" would be downloaded to the SD card connected to a linux machine using one of the following commands:
# dd bs=4M oflag=sync if=debian_2g.img of=/dev/sdX
or
# cp debian_2g.img /dev/sdX
where X is the uSD card.
Official images
A20-OLinuXino-MICRO preliminary Debian image
Debian image with support for LAN, USB, SD-Cards, LCD, HDMI, SATA
In this Debian distribution are installed:
- xfce4 desktop environment
- gcc 4.6
- mplayer
Tested moules with this image
- USB-ETHERNET-AX88772B
- MOD-WIFI-RTL8188
- A13-LCD 4.3″TS 4.3″ LCD with backlight and touchscreen 480×272 pixels
- A13-LCD7″TS 7″ LCD with backlight and touchscreen 800×480 pixels
- A10-LCD10″TS 10.1″ LCD with backlight and touchscreen 1024×600 pixels
- HDMI
- Micro SD card
- SD/MMC card
- OTG USB
- HIGH SPEED HOST1 USB
- HIGH SPEED HOST2 USB
- ETHERNET 100MBIT
- SATA
- Audio IN
- Audio OUT
- I2C2(400KHz)
- I2C1(200KHz)
NOTE! The default username/password combination is root/olimex
A20-OLinuXino-MICRO preliminary Android NAND image
Android 4.2.2 for A20-OLinuXino NAND
A20-SDK for building Android images
Projects
Under construction
FAQ
Q: How to download new Android image to the NAND memory of my A20 board?
A: To repair the image on the NAND re-upload it following these steps:
- 1. Install and run PhoenixSuit (can be found here: download from google drive).
- 2. Go to firmware tab of the program and point to a valid Android image (the latest official one may also be downloaded above).
- 3. Disconnect the power supply and USB cable from the A20 board.
- 4. Make sure NAND_E jumper is closed.
- 5. Press and hold RECOVERY button, apply power supply (6-16)V, release RECOVERY button.
- 6. Connect USB cable to the mini USB connector.
- 7. You will be asked for drivers for the bootloader. Navigate to the folder where you extracted the PhoenixSuit and install the drivers from the respective executables (or manually point the installer to the drivers folder in the PhoenixSuit installation path).
- 8. PhoenixSuit will detect the board and would ask for the method of writing the image. Choose method of writing the image and confirm your wish to write the image.
- 9. Wait till upgrade succeeds
- Content is available under GNU Free Documentation License 1.3 or later unless otherwise noted.

